Flashlight Masterpiece: How to paint with light

A house is traced over a life preserver using a flashlight during a 30 second exposure. Photo by Chris Richards
Pablo Picasso, Vincent Van Gogh and Claude Monet. All of them are famous painters in their own right. But what many people don’t know is that with just a flashlight, a camera and a little bit of patience, anyone can create a light painted masterpiece.
Like the name implies, light painting is almost exactly like creating a regular painting, except your paintbrush is a flashlight and your camera acts as a canvas. Unlike traditional painting, the magic happens over a matter of seconds when the shutter is released and the lens is open.
Beginners or photography pros alike can indulge in light painting because it’s just that simple. “Painting with light is just using a flashlight to trace around your subject, or to establish where your subject is,” says Ted Kloske. With over 30 years of experience as a photographer, Kloske uses and understands the value of the technique that even Picasso himself has employed. “It’s been around for a long time. It was really popular sometime in the 70s and 80s.”
1. Get your gear together
You’ll need your camera and either a tripod or flat surface to place your camera on. After that, find your light source. “You can use anything that lights,” says Kloske. “Cell phones, flashlights, candles, sparklers or a camera flash to freeze the action.”
2. Pick your place
Finding a dark setting to take your photos in is also very important. With the longer camera exposures, you will want someplace free of bright light sources that may overtake your final piece. Someplace indoors at night with the lights off or outside at a park would work.
3. Set up your camera
Once you have your location set, your camera in place and light in hand, the last and most important thing is to adjust your camera settings. A lot of the fun of light painting is seeing how each exposure turns out, and every change in settings will give you a different result. An ideal shutter speed to begin with is around four seconds, but you can lengthen or shorten it depending on the picture you’d like to paint. As with any photo, make sure your subject is in focus.
4. Let the fun begin
With your settings adjusted and everything in place, it’s time to let your imagination takeover. Take your flashlight or light source and when you release the shutter, move your light around to your heart’s content. Whatever path you trace in the air will show up as a solid line in the final image. Outline objects, or create new, abstract images floating in midair – you’re only limited by the things around you and your imagination. If you want to draw a more complex image, lengthen your shutter speed to give yourself the time. You can also take an opposite approach and move your camera while the shutter is open and trace with stationary lights around you.
Your first shots may not sell for millions, but what you will end up with is a unique and fun creation that is purely your own. With enough practice, dedication and creativity you’ll be producing top notch photos that could light up any room.

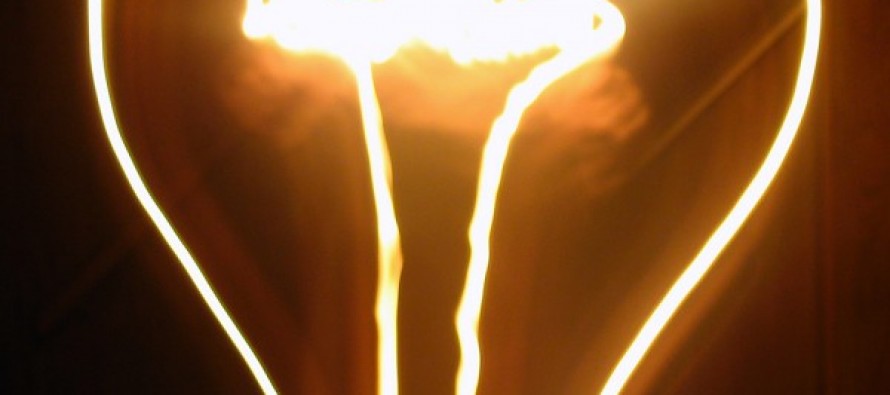
Two candles are used to create a light bulb in this 10 second exposure. Photo by Chris Richards

A light painting of downtown Windsor using camera rotation and zoom during the exposure. A six second shutter speed was used. Photo by Chris Richards
